REVIEW · BUDAPEST
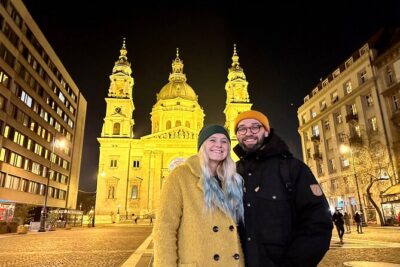
Budapest Photo Walks
Book on Viator →Operated by Budapest Photo Walks · Bookable on Viator
Budapest photos improve fast with the right route. This 2 to 3 hour custom photo walk is built for getting real skyline shots without wasting time, and you can choose day or nighttime styles based on your energy and light. It also comes with a tripod so you are not juggling gear decisions while trying to frame the perfect view.
I especially like the composition coaching, because it works even if you are new and want help with basic camera settings. I also like the tripod included setup, which makes nighttime and bridge shots far easier and steadier than handheld guessing.
One possible drawback: because the stops can shift with weather and your fitness, you will want grippy shoes and flexibility. It is a walking-focused route, not a ride-that-drops-you-off-everywhere kind of tour.
In This Review
- Key highlights in plain terms
- Why this Budapest photo walk beats a random sightseeing loop
- Price and what you really get for $179.74
- Where you start at Batthyány tér (and how the route flexes)
- Gellért Hill: where the tour builds your best shots
- Castell de Buda and the Chain Bridge angle at night
- Liberty Bridge (Szabadság hid): the bridge-and-hill framing move
- Batthyány Square and the Parliament shot you can repeat
- Photo coaching: composition and camera settings support
- What to bring so the tripod actually helps
- Who this tour fits best (and who might want something else)
- Should you book Budapest Photo Walks?
- FAQ
- How long is the Budapest Photo Walk?
- What does the tour cost?
- Is the tour in English?
- Is a tripod included?
- Where do we meet for the tour?
- Can the itinerary change during the walk?
- Is private transportation included?
- FAQ
- What are the top viewpoint stops included on the route?
- Is free cancellation available?
- How many people are on the tour at most?
Key highlights in plain terms
- Two-person maximum keeps the pace personal and the photo help more focused
- Tripod included for steadier skyline, bridge, and night scenes
- Day or night photo walks with flexible dates and times
- Gellért Hill and multiple viewpoints planned for different angles
- Beginner-friendly coaching on composition and basic camera settings
- Off-the-beaten-track angles beyond the loudest crowd spots
Why this Budapest photo walk beats a random sightseeing loop
Budapest is one of those cities where it is easy to take photos and still feel like something is missing. The issue is usually framing. You walk to a famous spot, snap a picture, and then realize you missed the angle where the bridge lines actually lead into the skyline.
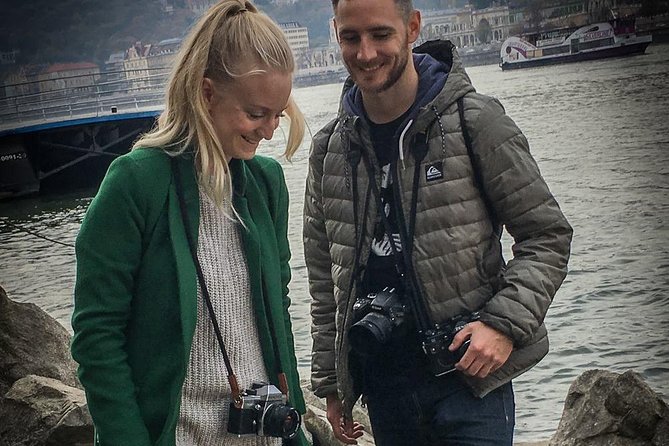
This photo walk is different because it is designed like a shooting route, not a checklist. You can pick a day or nighttime itinerary, and the guide adjusts the plan to match the light, the weather, and what you want to photograph. If you want a calmer pace for learning, you can do that. If you want more locations, you can usually ask for extra stops.
Also, the small group matters. With a maximum of 2 people, you are more likely to get hands-on help rather than a quick overview. You can ask questions while you are actually standing in front of the shot, which is where most beginners struggle.
Finally, you are not expected to already know photography. The tour can act like a primer: composition first, then camera settings if needed. That combo is what turns a nice trip into usable photos you are actually proud of.
You can also read our reviews of more tours and experiences in Budapest.


Price and what you really get for $179.74
At $179.74 per person for a 2 to 3 hour outing, this is not a budget add-on. But it also includes real value pieces that reduce your own hassle.
Here is what you are paying for in practical terms:
- Tripod provided, which is huge if you want night shots or long-exposure style steadiness
- Photo coaching, including composition and potential camera settings help for beginners
- A tailored route, where the number of viewpoints can flex based on your requests and fitness
- Small group size (max 2), which often leads to better attention and faster problem-solving
If you have ever tried to do night photography solo, you know how often you end up with blurry results or awkward compositions. The tripod and coaching combo is what helps you avoid that expensive-feeling trial and error.
Another quiet value point: the walk is offered in English, and you get a mobile ticket. That saves time at the start and lets you focus on arriving, not paperwork.
One more note: bookings average around 46 days in advance. That does not mean you cannot book later, but it is a good hint that the best time slots (especially for night) can go quickly.
Where you start at Batthyány tér (and how the route flexes)
The meeting point is Batthyány tér (HBudapest, 1011), in front of the metro M2 station. The tour ends at Batthyány tér as well, but the exact end moment is agreed with you at the beginning of the walk.
That end-point flexibility is worth paying attention to. If weather turns or you need extra time on a composition problem, you are not forced into a rigid stop-and-run timeline.
One more logistics detail that helps: there is no private transportation included. You are walking between viewpoints, so build your day around that reality. The start area is near public transport, so you should not struggle getting there, but do plan on moving.
And yes, it is offered Thursday through Sunday during the listed hours (10:00 AM to 6:00 PM in the current schedule window). Nights are part of the plan too, but the operation days are limited, so check your dates early.
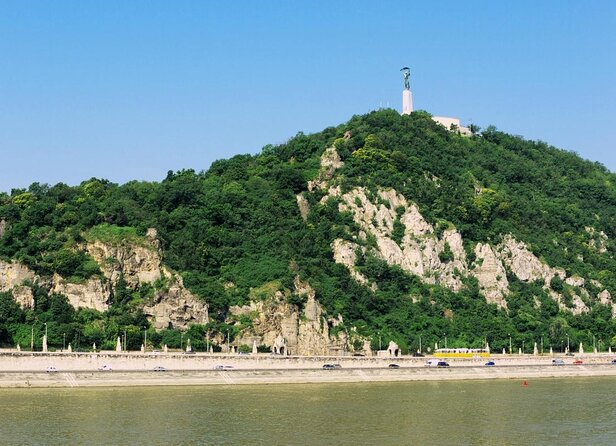
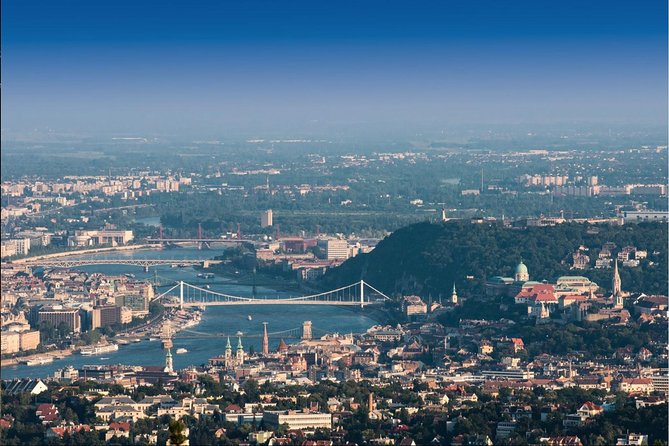
Gellért Hill: where the tour builds your best shots
Gellért Hill is the core. It is where you can usually cover 4 to 5 main view points depending on your needs and fitness. During the same general area, the hill works for both day and night photography.
Two things make Gellért Hill a smart choice for a photo walk:
- You get multiple angles from one broad area, so you can compare compositions without burning time traveling across town.
- The hilltop views naturally support different approaches. You can shoot wide for the river-and-city feeling, or tighter for bridge and skyline geometry.
The tour also explicitly accounts for reality: the exact itinerary depends on your request and on weather. That is actually a benefit. If visibility is clear, you will likely move through more planned viewpoints. If weather is rough, you will adjust rather than push through bad conditions.
Practical advice for this stop: wear shoes with grip and take your time. You are not just “walking,” you are pausing, resetting your tripod, and checking angles. Give yourself a little breathing room so you can concentrate on the shot.
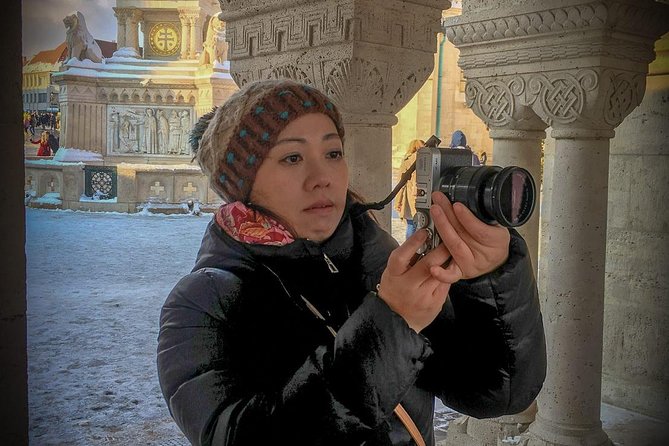
Castell de Buda and the Chain Bridge angle at night

This stop is part of the night tour only. It includes a view area described as a roundabout setup with a Chain Bridge view.
Why include this at night? Because Chain Bridge and the surrounding river-side architecture can turn into an entirely different kind of photo. During daylight you often focus on clarity and form. At night you can focus on light patterns, symmetry, and how reflections can pull your eye through the frame.
The tripod becomes especially useful here. Handheld at night usually means either higher ISO noise or softer images. With the tripod available, you can slow down enough to work on composition instead of fighting blur.
One caution: night photography rewards patience. If you rush, you lose the chance to line up the bridge angles and spacing that make the shot look intentional. Since the tour is flexible, you can ask for a little extra time at the night-focused viewpoint if that is what you want.


Liberty Bridge (Szabadság hid): the bridge-and-hill framing move
Liberty Bridge is included for both day and night itineraries. The focus here is the bridge itself and the way it connects visually to Gellért Hill.
This is a strong choice because it gives you a “story” in one frame. You can show the bridge, then include the hill view so your photo has layers. It is also a helpful location for learning how to compose. Once you understand how the lines of the bridge and waterfront lead across the image, you can apply the same thinking to other viewpoints.
At this stop you have about 20 minutes in the plan. In a small group, that is enough time to test a few angles and settle into a composition. If you are new, use that time to practice the basics: horizon placement, vertical alignment, and how much of the scene you actually need.
If you are shooting at night, the same composition rules apply, but you will spend more time on stability and timing. The tripod lets you do that without feeling like you are sacrificing your photo quality.
Batthyány Square and the Parliament shot you can repeat
Batthyány Square is the classic view of Parliament. This spot appears in both the day and night tours, and the plan allows about 15 minutes.
This timing is realistic. Parliament views look amazing, but they can also tempt you to overstay because you keep wanting one more variation. The tour structure helps you avoid that. You get focused time, then you move to the next composition, rather than losing the session to endless tweaking.
In day light, Parliament shots usually reward clean structure. Look for steady alignment and try different framing widths so you do not end up with a photo that is all building without context, or all context without the subject.
At night, you can treat the shot like a lesson in light and geometry. With a tripod available, you can experiment with slower shooting methods and calmer framing decisions.
The practical win here is repetition. Even if you come back to your hotel and check your camera files later, you will have a small set of photos from a consistent viewpoint. That makes it easier to pick your favorites.
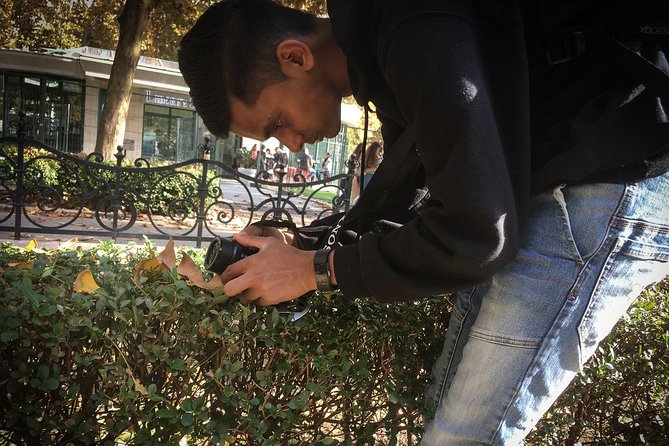
Photo coaching: composition and camera settings support
The tour can teach composition and camera settings if you need it, and it is described as a good primer for beginners. That matters because beginners usually do not lack motivation. They lack a simple method.
What you can expect from the coaching style (based on guide feedback you can learn from) is patient, step-by-step help. The name Zoltan shows up in the strongest notes, with praise for explaining photography in a way that makes sense, plus knowing solid night spots where the lighting actually cooperates.
Even if you only catch part of the coaching, you should leave with a clearer idea of how to:
- frame buildings and bridges so they look intentional
- control basic camera choices when light changes from day to night
- use the tripod confidently rather than treating it like a heavy accessory
If you already shoot and just want better angles, you can still benefit. A good photo walk is not only about settings. It is also about knowing where to stand and how to direct your attention to the right details at the right time.
What to bring so the tripod actually helps
Because the itinerary can change with weather and your fitness, you should pack like the route might get damp, windy, or slower than you planned. You do not need extreme gear, but you do want basics.
Bring:
- Your camera or phone, plus charging capacity for a 2 to 3 hour shoot
- A tripod head mindset: even with a tripod provided, you should still know how you like to frame (wide, medium, tight)
- A small weather layer, since the plan depends on conditions
- Comfortable shoes for Gellért Hill and repeated stop-and-pose moments
Also, plan your expectations. This is not a rapid-fire sightseeing sprint. It is a photo route where time at each viewpoint is part of the structure, typically 15 to 20 minutes per main stop.
Who this tour fits best (and who might want something else)
This is a great fit if you:
- want better photos in limited time
- are a beginner and want guided help with composition and basic settings
- prefer small-group attention over joining a large crowd
- like city photography and want angles that feel a bit away from the most obvious tourist viewpoints
It might be less ideal if you:
- want a car-based tour with zero walking
- hate any uncertainty about exact stops (the route can vary with weather and fitness)
- already feel fully confident with your camera and only want a strict, fixed itinerary
Because the tour is customizable, you have some control. But you should still expect that the guide may adjust how many viewpoints you cover in the Gellért Hill area.
Should you book Budapest Photo Walks?
I think this is worth booking if you want a photo-focused Budapest experience that respects your time and your learning curve. The strongest reasons to choose it are simple: tripod included, small group (max 2), and photo coaching that can work for beginners. Add the day-and-night flexibility and you get two different ways to experience the same famous city angles.
Book it sooner if you want a specific day or nighttime time slot, since advance bookings are common. If you care about getting steadier night shots, you will especially appreciate having the tripod handled for you.
If you are purely looking for general sightseeing, you might find other tours more efficient. But for photos you can actually use, this walk is built to help you stand in the right places and work the scene with purpose.
FAQ
How long is the Budapest Photo Walk?
It runs about 2 to 3 hours.
What does the tour cost?
The price is $179.74 per person.
Is the tour in English?
Yes, it is offered in English.
Is a tripod included?
Yes. A tripod is included.
Where do we meet for the tour?
You meet in front of the metro M2 station at Batthyány tér (HBudapest, 1011 Hungary). The exact end point is agreed with you at the beginning of the tour.
Can the itinerary change during the walk?
Yes. The number of viewpoints and the route can vary depending on your fitness, requests, and the weather.
Is private transportation included?
No. Private transportation is not included.
FAQ
What are the top viewpoint stops included on the route?
The walk includes Gellért Hill, plus viewpoints connected with Chain Bridge, Liberty Bridge (Szabadság hid), and a classic Parliament view from Batthyány Square.
Is free cancellation available?
Yes. You can cancel up to 24 hours in advance for a full refund.
How many people are on the tour at most?
The tour/activity has a maximum of 2 travelers.